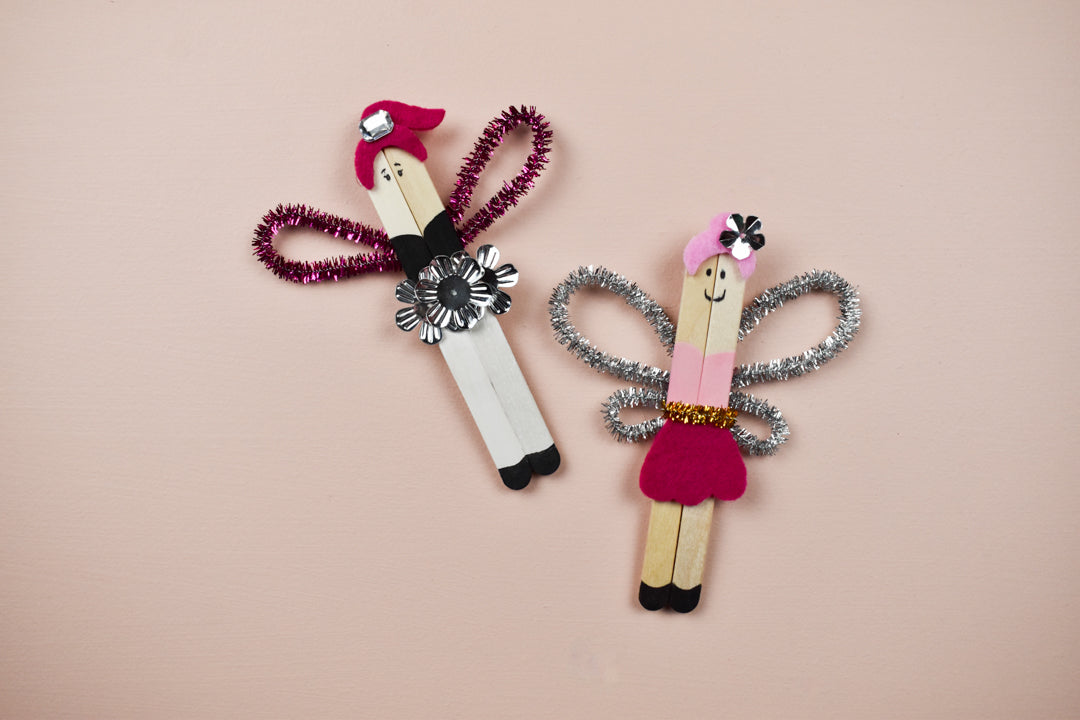
Craft Stick Fairies DIY
Share
I don’t know about the littles in your family, but my nieces and nephews have always loved pretend play and can get carried away with their imagination, one of the best parts about being a kid. This craft of making fairy friends is perfect for the kids in your life that love imaginary play as well!
Following along with the steps, you’ll be able to make an adorable fairy, but in addition, you’ll know how to create this type of craft to make countless fairies to fill an entire imaginary world. Make some skirts from felt or cluster sequins for a petal-filled look, cut out different hair styles and accessorize with rhinestones, sequins and more.
Another plus, small scale crafts like this can be made with scraps from past projects which is always great and even less clean up time, creating more time to play!
Materials Needed:
- Wooden Craft Sticks – included in Kid Made Modern’s Arts and Crafts Supply Library
- Felt – included in Kid Made Modern’s Arts and Crafts Supply Library
- Sequins – included in Kid Made Modern’s Arts and Crafts Supply Library
- Fuzzy Sticks – Included in Kid Made Modern’s Arts and Crafts Supply Library
- Rhinestones
- Scissors
- Glue Dots
- Marker
- Kid Made Modern Washable Paint
- Paint Brushes

Instructions:
Step 1
To make the base of the fairy, start with 3 wooden craft sticks. Add 3 glue dots down the first craft stick and add the other 2 craft sticks on top directly next to one another to cover the entire craft stick with the glue dots. Attach the 2 craft sticks lightly lower than centered so you can only see the back craft stick showing on the top, this will make it easy to have the bottom of the craft sticks look like feet when we’re finished.


Step 2
The side with 2 craft sticks side by side is the front of your fairy, starting about ¼ of the way down from the top, paint ¼ of the front to be a shirt for your fairy.

Step 3
Using the felt, cut out a floral shaped skirt and hair. Lay the felt over the craft stick base to ensure the felt cut out will be wide enough at the top of the skirt to cover the whole width. Using glue dots, attach the skirt to the wooden craft stick base just below the painted portion.
To create hair, cut a rounded shape with a bun or ponytail on top, attach with a glue dot.

Step 4
It’s time to add your fairy wings! Using 3 metallic fuzzy sticks that measure 6” long, bend 2 in half being sure not to fold them but keep them rounded where they’re bent. Flip the wooden craft sticks over and glue dot the bent fuzzy sticks onto the single craft stick on the back with a slight upward angle.
For the bottom portion of the wings, cut the third fuzzy stick in half and bend each half in the same style. Glue dot them below the large wings angling down to create butterfly style wings.


Step 5
With black paint, add shoes to the front of the fairy. Using the paint brush, paint a curved line on the bottom two wooden craft sticks and fill in with paint.

Step 6
Using a marker, draw a small face under the felt hair that has already been glued on. Feel free to add as many facial features as you want!

Step 7
Lastly, continue adding any additional decorative details, such as sequins in the fairy’s hair, a fuzzy stick belt or rhinestone accessories. Now your fairy is complete! Make multiple fairies using the same materials in numerous ways so each one is unique!

Now all that’s left is creating an imaginary place to play with your fairy! If you made your own fairies, I’d love to hear all about how you made your make believe, winged friends come to life through crafting!

About the Author:

Fiber artist and craft enthusiast, Tessa Anderstrom, is the owner of handmade shop Studio Jane which focuses on sustainably made home décor and handmade art. As an avid DIYer with a passion for learning new skills, Tessa enjoys sharing that knowledge with crafters of all ages.
