DIY Cereal Box Notebooks
Share
OK, technically you can make these cute little notebooks out of any cardboard food box. "Recycled Food Box Notebooks" doesn't quite have the same ring to it, but you can definitely make these from whatever extra boxes you've got in your pantry. No matter what you call them though, this project is such a fun and easy way to make custom sparkly notebooks for all kinds of things.

Materials:
- our Smarts and Crafts Sparkle Stash Kit
- a cardboard food box (thinner cardboard works better than larger, thicker boxes)
- sturdy scissors
- glue
- a hole punch (depending on how thick your cardboard is, a stronger craft hole punch works better than the schoolhouse variety)
- paper (blank, lined, graph, or anything you'd like!)
- stapler
Steps:


1. Cut a rectangle out of the cardboard food box: you can pick any size you'd like, but we suggest starting with a smaller size. Cut out a cardboard rectangle about 5" X 8". Fold the rectangle in half, with the printed side turned inward, scoring the fold with your fingernail.

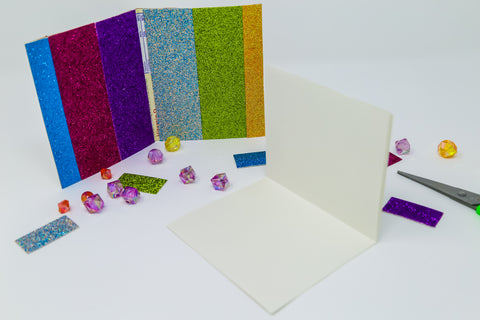
2. Decorate the inside of your notebook: get creative with the Sparkle Stash Kit supplies and decorate the inside of your notebook, leaving a little margin down the scored middle—you'll be stapling in your paper there next. We loved using the sparkle sticker sheets to make a rainbow of stripes (depending on the printed surface, you might need to use glue to help the decorations stay). Trim any excess decorations flush with the notebook edges.


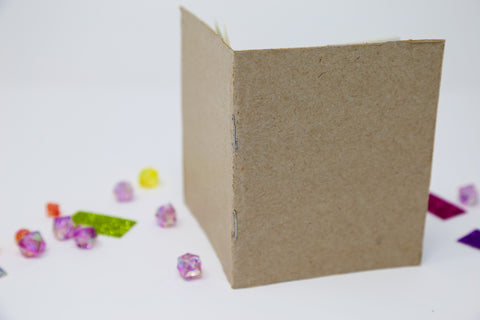
3. Add the paper: stack several pieces of paper (we used 5 for the thinner graph paper and 4 for the thicker plain paper) and trim to a size slightly smaller than the notebook cover. Fold the stack of paper in half and crease well. Unfold the stack and staple the paper to the scored middle of the notebook inside cover. Depending on how thick your cardboard and paper stack are, you might need to staple from both the outside of the notebook spine and from the inside of the folded paper to get a good hold.

4. Cover the spine and decorate the outside of your notebook: cover the outside spine of your notebook using a few pieces of glitter tape (you can brush a little glue on under the tape to help it stay and cover the staples). Then use any of the Sparkle Stash Kit supplies to decorate the front and back of your notebook. Try more stripes with the glitter tape, make a mosaic of sticker sheets, or glue poms or pailletes on. Whatever you like!


5. Add a clasp: using your hole punch, punch two holes in the center of the front cover near the open edge. Pick your favorite bead and thread it onto a piece of cord. Thread the ends of the cord down through the two holes and tie inside the cover. Punch a third hold in the center of the back cover near the edge. Cut a second piece of cord long enough to wrap around the notebook a few times. Insert one end of the cord through the hole and tie a knot inside the back cover. You can then wrap the long cord piece around the notebook, winding it around the bead clasp to hold the notebook closed.


Once you get the hang of it, try making different sized notebooks with all sorts of decorations!
* * *
Buy our Smarts and Crafts Sparkle Stash here!

* * *

