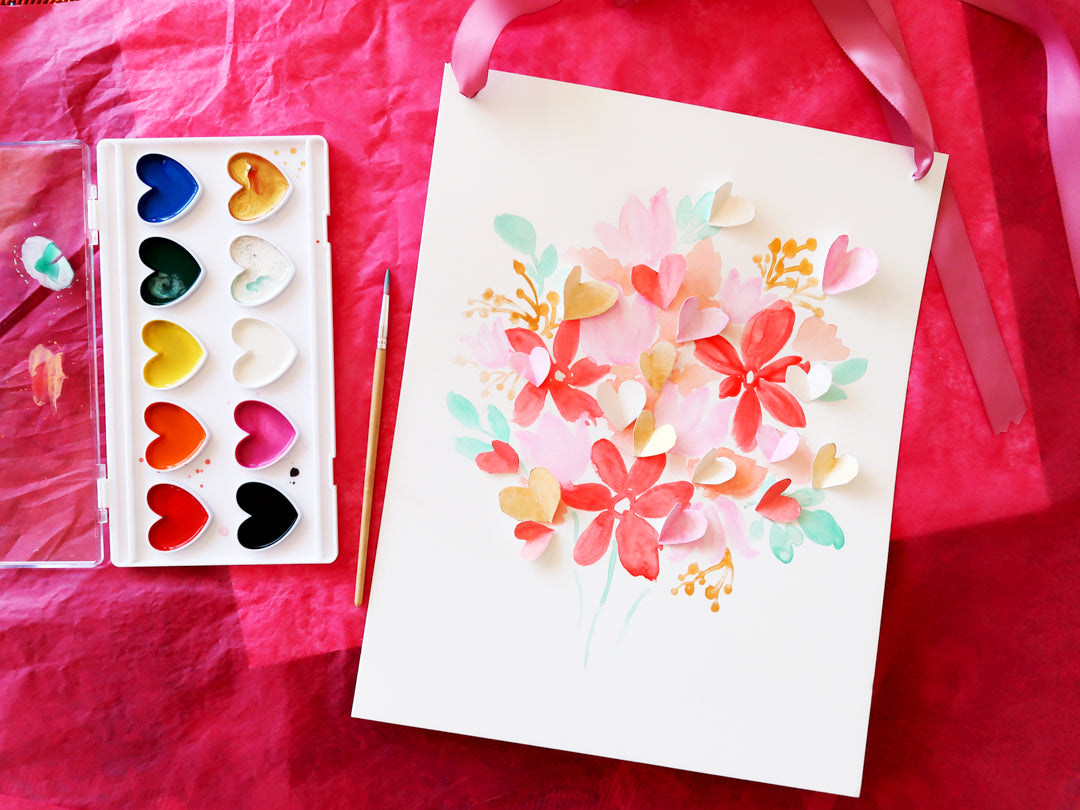
DIY Watercolor Bouquet Painting with 3D Hearts
Share
Valentine’s Day is all about showing your love and appreciation for those special people in your life. Art and Flowers are the perfect gift, so why not combine them?
In this tutorial I will show you how to create a watercolor flower painting with 3D hearts, using the Kid Made Modern I Heart Watercolor. It only requires the kit and a couple supplies that you probably have laying around your house.
Materials Needed:
- Kid Made Modern I Heart Watercolor
- 2 pieces of 11x14 watercolor paper (or heavy weight mixed media paper)
- Scissors
- Glue Dots or Hot Glue Gun
- Pencil
- Paper Towel
- Water Cup
- Ribbon (optional for hanging)
Instructions:
Step 1
Gather your Supplies

Step 2
Take one of the 11x14” pieces of paper and use your pencil to draw about 15-20 hearts. They don’t have to be perfect. You want different sizes.

Step 3
Next, grab your Kid Made Modern Watercolor Set, use the pink to start painting over the hearts. Notice in the image how loose the paint is applied. Do not worry about staying inside the lines because they will be cut out once they are dry.

Step 4
Continue painting the hearts with the gold, red and silver. Once all the hearts are painted, set the paper to the side to let it dry.

Step 5
Let’s start painting our flowers! Grab the second piece of 11x14” paper and put some pink on your paint brush. Start your tulip by painting a curved petal, starting on the right side of the flower.

Step 6
Next paint a petal more up and down right next the first petal, this will be the middle petal. Finish the flower by painting a third petal curving the left side of the flower. You have created a tulip!

Step 7
Continue painting tulips around the paper leaving white space in between them. Remember to paint different sizes to make the bouquet more interesting.

Step 8
Next put some red paint on your brush and start filling the white space you left, with red daisy-like flowers. Paint approximately three large ones.

Step 9
Start with a red open circle and use it as a guide to create the petals around it. Some of the petals should be hitting up against the tulips you have already painted.

Step 10
If you need to add more tulips, as you add in your red flowers, do so now.

Step 11
Next, to add some pretty details, put some gold paint on your brush and create thin lines for stems coming out of some of the flowers, then add little gold circles for berries.

Step 12
Continue adding gold berries throughout the painting.

Step 13
Mix the red and gold paint together.

Step 14
Use the red and gold mixture to fill more of the white space with loose flowers, like shown in the image.

Step 15
At this point you should have some pretty flowers and gold berries on your paper!

Step 16
Mix the green and silver paint together.

Step 17
Using the green mixture, create thin lines for stems at the bottom and along the outside of the flower bouquet.

Step 18
For the stems on the sides and top of the bouquet, add leaves.

Step 19
Now you have completed the flower bouquet! Next we add in the hearts!

Step 20
Cut out the painted hearts you made in the beginning (make sure they are fully dry first).

Step 21
Using your fingers bend the hearts in half, enough where they look like butterfly wings.

Step 22
Once they are all bent, start applying them to the painting. Using glue dots, apply one dot to the back of each heart.

Note: If you are using a hot glue gun for this step, let an adult assist you.
Step 23
Start placing them in groupings throughout your painting. I try to mix up the colors so not all of one color is grouped together.

Step 24
You have completed the project! You can write on it and give it as a card or you can attach a ribbon so you can hang it on a wall. Happy Painting!


About the Author

Rachel is the artist and founder of Pink Puddle Studio LLC. Her mural work has been televised on CNBC’s Cash Pad. Her work has been featured in HGTV Magazine, Phoenix New Times, Phoenix Home & Garden, Arizona Highways Magazine and College Times.
Connect with Rachel on instagram @pinkpuddlestudio and www.pinkpuddlestudio.com
