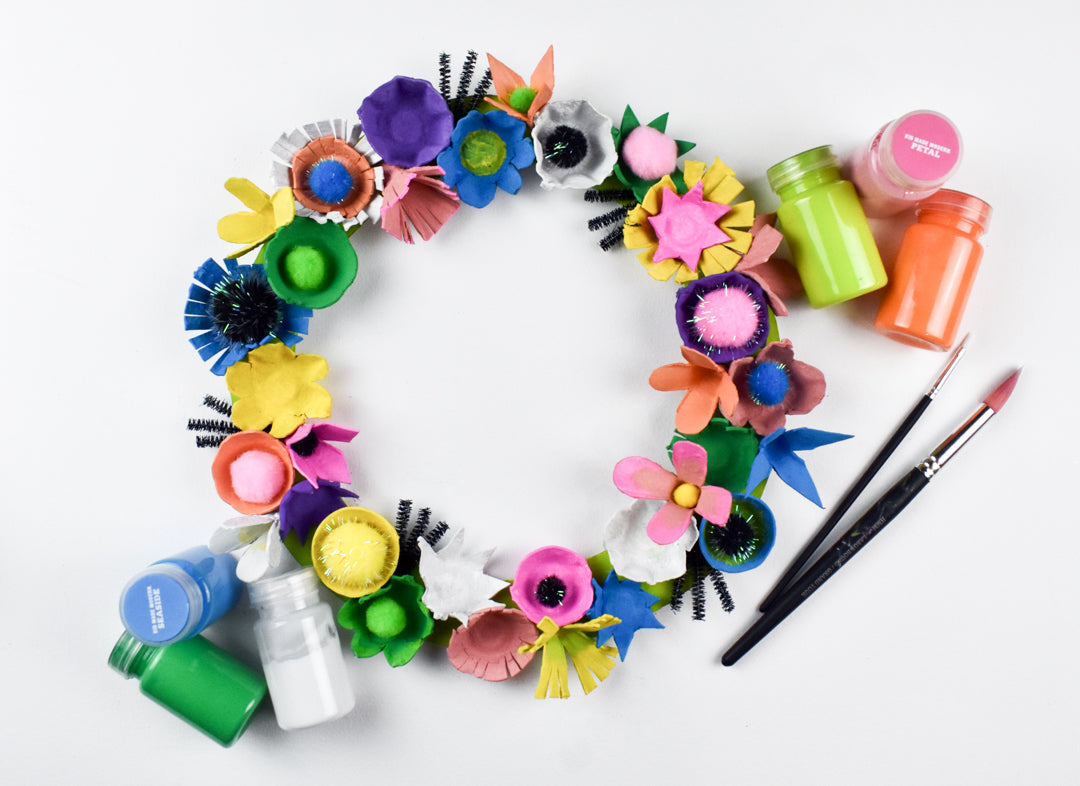
Egg Carton Spring Wreath DIY
Share
As we enter the Spring season, we’re seeing signs of new growth and renewal, our earth in bloom! All these beautiful details are reminders to take care of our globe, our home; and recycling materials to create crafts is one of my favorite ways to do just that!
With egg cartons and paint, you’ll be able to make your own recycled wreath for Spring.
Follow along for all the steps to make your own wreath, then get creative using extra elements from the Kid Made Modern Arts and Crafts Supply Library to add a little sparkle, texture and three-dimensional effects. I chose to add in black, sparkly details for a modern look, but you can create your wreath in countless different ways for Spring or any season to come!
Materials Needed:
-
Kid Made Modern Arts and Crafts Supply Library
- Fuzzy Sticks
- Pom Poms
- White Craft Glue
- Scissors
- Glue Dots
- Cardboard – 10” square or any size depending on the size wreath you want to create
- Recycled cardboard egg cartons – My wreath used 2 egg cartons
- Kid Made Modern washable paint
- Paint Brushes

Instructions:
Step 1
Draw a 2” circular ring on a piece of cardboard and cut it out. Next paint the cardboard ring and set aside to dry.


Step 2
Next, using scissors cut apart the egg cartons, isolating the rounded cup portions away from the triangular separating pieces. Both pieces will be used to craft different types of flowers for the wreath. Cut the uneven fragments of cardboard from the top to start with smooth surfaces, then cut decorative shapes and edges to create flower patterns.


We used a few different styles; including fringe edges, rounded petal shapes and triangular points.

For the triangle cardboard pieces, cut down each corner toward the pointed end to create four sides, then add decorative cuts to each quarter.


Step 3
Paint! This part can be as basic or as creative as you like, start by painting a solid coat of paint on each egg carton flower. Paint one side at a time, setting aside to dry before turning over to paint the other side.
After each flower has a coat of paint, add fun details with other colors of paint. From painting the edges of some flowers with different colors to bright brush strokes in the center of the flower, there are countless ways to decorate the flowers with paint.

Step 4
Once all your egg carton flowers are dry, glue them onto the cardboard ring. White craft glue will work perfectly for this step, but glue dots or hot glue are also options to construct your wreath.
It’s best to glue the larger flowers down first, clustering them next to one another. Then fill in with the triangular flowers that can squeeze into smaller sections.
Continue gluing flowers until the entire wreath form is covered.


Step 5
Add flower centers and details using pom poms, put a glue dot on the back of each pom pom and press into the center of some of the flowers. Mix and match different colors and size pom poms for a dimensional look.
I used a combination of different color but focused on black metallic pom poms for a modern look.

Step 6
For the last step, to add some extra details using fuzzy sticks, cut 6” fuzzy sticks into three pieces. Cluster the three 2” pieces together and add a glue dot on the back where the three pieces meet at a point, then attach the cluster of fuzzy sticks to the wreath. Slide the cluster in between flowers to hide the glue dot end and your wreath will appear to have little bursts of fuzzy sticks to mimic greenery and added detail.

With your beautiful and completed wreath, you can be proud of recycling your trash into a newly crafted treasure. On that note, I’m going to hang my wreath on the front door to kick of the season!

Thank you for crafting with us! Happy Spring!
About the Author:

Fiber artist and craft enthusiast, Tessa Anderstrom, is the owner of handmade shop Studio Jane which focuses on sustainably made home décor and handmade art. As an avid DIYer with a passion for learning new skills, Tessa enjoys sharing that knowledge with crafters of all ages.
