
Great Pyramid Mail Art
Mailing artful creations via the trusty USPS is a fun, fun pastime. It will delight the sender (you) and definitely any friends who receive it (we promise!). The more peculiar your posts are, the gigglier everyone will be. Here are instructions for one beautiful piece of mail to construct, decorate, imbue with you-ness…and entrust to postal workers!
Supplies needed:
- Cardboard
- Paint
- Tape
- Postage Stamps (exact postage depends on size and weight)
Steps:

1. Disassemble a kid made modern box (or use recycled cardboard) and cut out a 6.5” equilateral triangle. Use scissors or, if you have an adult present, use a mat knife.

2. Cut out 3 isosceles triangles that are 6.5” at the base, and 9” at center height.

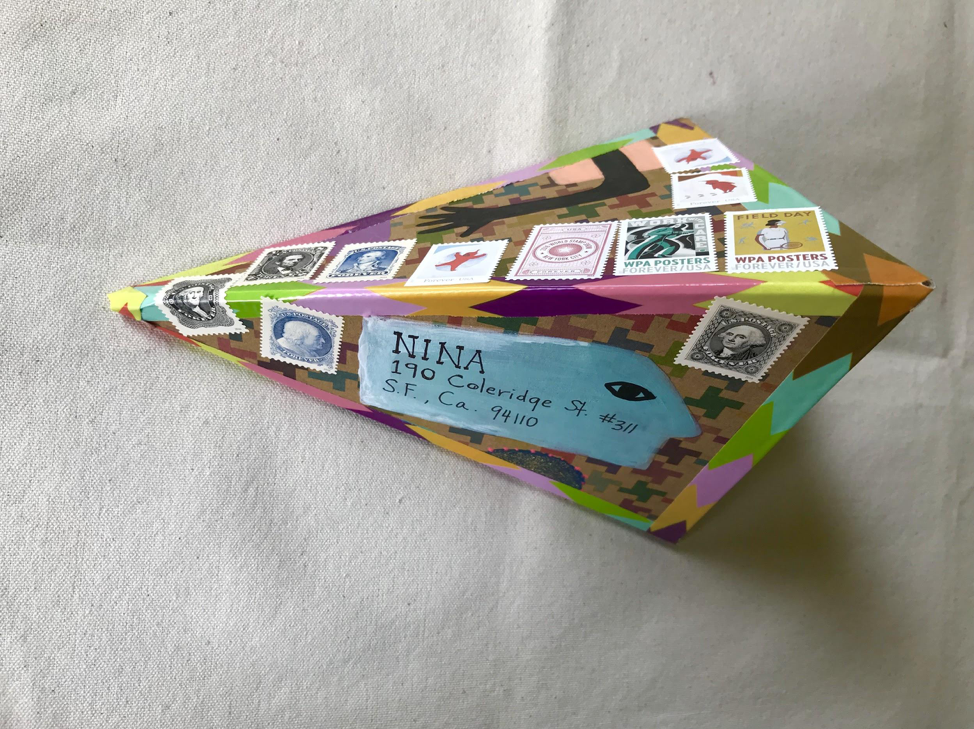
3. Paint all 4 triangles with any design you like. Leave room for postage stamps.
And write your friend a note!

4. Attach tape to the back of your equilateral triangle, sticky side facing away.
5. Fold the tape back and attach the bottom of each isosceles triangle to it.

6. Now you should be able to hold the shape together to make sure it fits right.

7. Tape all of the seams together.
8. Attach postage stamps and pop it in the mail.
* * *
Post by Kiera Coffee. Kiera is a prop stylist, writer, and crafter. To peek into her world of ideas (and postal high jinks) follow @KieraCoffee or visit kieracoffee.com.