Make Your Own Handmade Stencils!
Share
If you're looking for an easy art project with items you probably have at home, this one is for you. Handmade stencils are easy to make, fun to explore, and great for small hands that are learning to cut and hold paintbrushes and pens.
Read on as Christine Joy Design shares how to make wall art with handmade stencils.
Materials:
- Acrylic paints
- Foam brushes
- Pencil
- Paper
- Scissors
- Tape
How to:
Step 1
Choose your colors! Decide which ones you want to use for your art and set those paints aside. Make sure to have a foam brush for each color you’d like to use.
Step 2
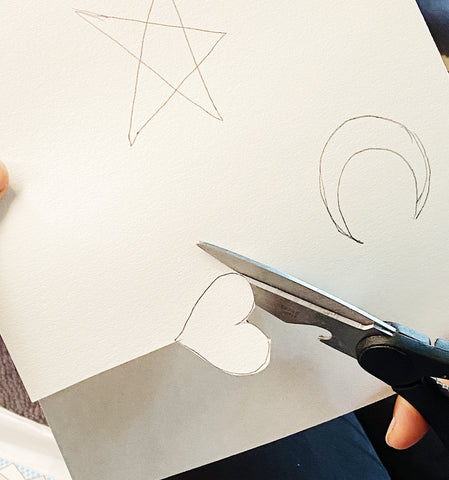
Draw the stencil shapes on paper lightly with a pencil. Make sure to leave a bit of space around each shape you are drawing.

Step 3
Make one straight cut in the paper until you get to your shape and then carefully cut out each shape. You can discard the shapes that you’ve cut out.

Step 4
Lightly draw a square around each cut out. Cut the square around your shape and tape closed the line that was cut to get to your shape.

Step 5
Decide where on your paper you want to use your different stencils. Place the stencil down on your paper and hold it firmly with one hand.
Step 6
Squeeze your chosen paints onto a plate. Dip your foam brush into the paint and dab the brush repeatedly over the stencil until the right amount of color is achieved. Continue the stenciling process until the entire paper is covered with a pattern.

Step 7
Put print in a cool dry place to dry.
After you print is dry, you can hang it up or frame it and turn it into a beautiful piece of wall art!

