Rainbow Bead Necklace DIY
Share
My three-year-old daughter is recently obsessed with two things: necklaces and rainbows! I love creating rainbow crafts with my kids. They get so excited about bright colors! When we first looked through the Bright Beads Jewelry Kit, she went straight for the rainbow beads and was so excited to create with it! So we decided to try a new polymer clay technique to make some big rainbow beads and charms. It turned out so well, and she is in love with her new necklaces. Read below to learn how to make these rainbow beads at home!
Materials Needed:
- Bright Beads Jewelry Kit
- Polymer clay in rainbow colors
- A rolling pin
- A sharp knife
- Toothpicks
- Cookie cutters (optional)
- A cookie sheet
- Parchment paper

Instructions:
Step 1
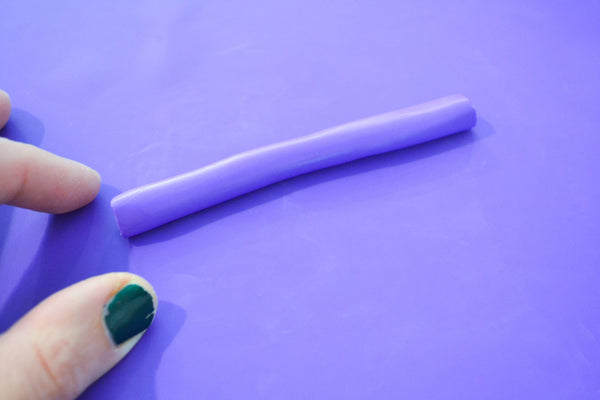
Begin by making a rainbow cane out of polymer clay. First, break off a piece of purple clay and roll it into a log. Ours was about ½ inch thick and a few inches long. Next, break off a piece of blue clay. Squish it in your hands for a minute to soften it, and then roll it out into a thin rectangle shape (or as close as you can get it). Next, wrap the blue clay around the purple log, pinch the ends closed, and trim off any extra. Repeat this with green, then yellow, then orange, and finally red clay. Your log will now be much thicker!

Step 2
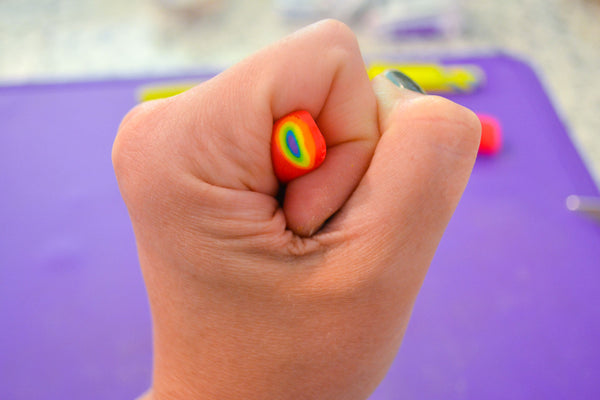
Take the log of clay in your hand and begin squeezing it in the middle. Work from the middle out to the edges, squeezing and lengthening the clay until it is about ½ inch thick again. This is called reducing. Use your sharp knife to trim off any funny ends. You will see a cross-section of all of your rainbow colors when you cut it!

Step 3
Next, use your knife to slice your cane into thin circles. Each circle will have all of the rainbow colors! If your clay doesn’t retain a circle shape when you cut, it may be too warm. Try leaving it to sit in a ziplock bag for an hour and then come back to try again (don’t worry - it won’t harden on its own!). Next, cut each of the rainbow circles in half to create little mini rainbow shapes.

Step 4
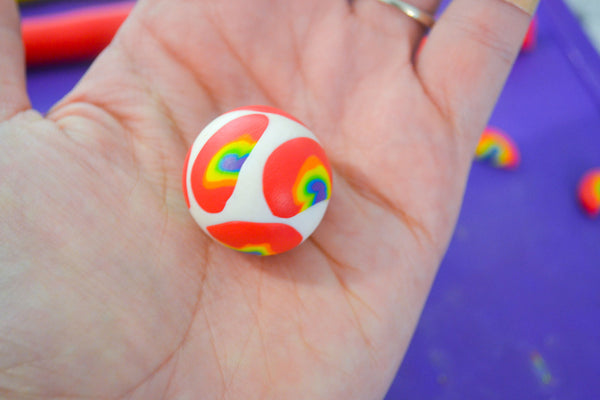
To make rainbow beads, begin by choosing a base color (we liked white and light blue!). Roll a ball in your hands out of your base color. Then, gently press your rainbow shapes all over the ball, just enough for them to stick. Roll the ball in your hands again until it is smooth. Your rainbow shapes will stretch out to cover the ball. Finally, use a toothpick to make a hole through the center of your ball to turn it into a bead.
Step 5
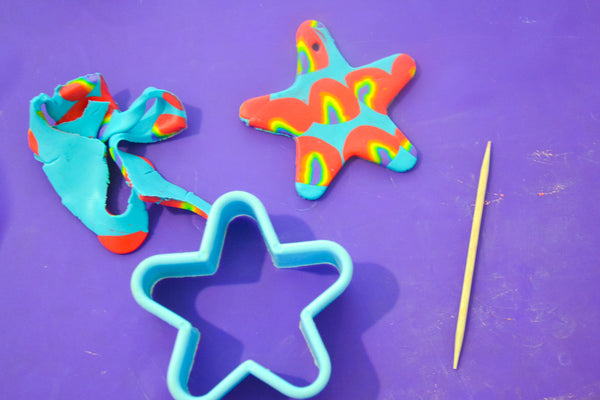
To make a rainbow charm, begin by rolling a flat pancake of your background color clay. Next, place your rainbow shapes on top and roll over it all again with your rolling pin. Use a cookie cutter to cut out the shape you want. Poke a hole towards the top with a toothpick.

Step 6
Bake your clay according to package instructions. We like to bake ours on a cookie sheet lined with parchment paper.
Step 7
Use your Bright Beads Jewelry Kit to make necklaces with your rainbow beads! There are so many cool beads in this kit that will pair well with the ones you made.

We hope these rainbow necklaces bring some smiles your way!
Emily Limer is a mom of three and a teacher from North Carolina. She loves getting creative with her kids - at home and school - and has a passion for creating with recycled materials!


