
Watercolor Painting Wildflower Easter Bunny DIY
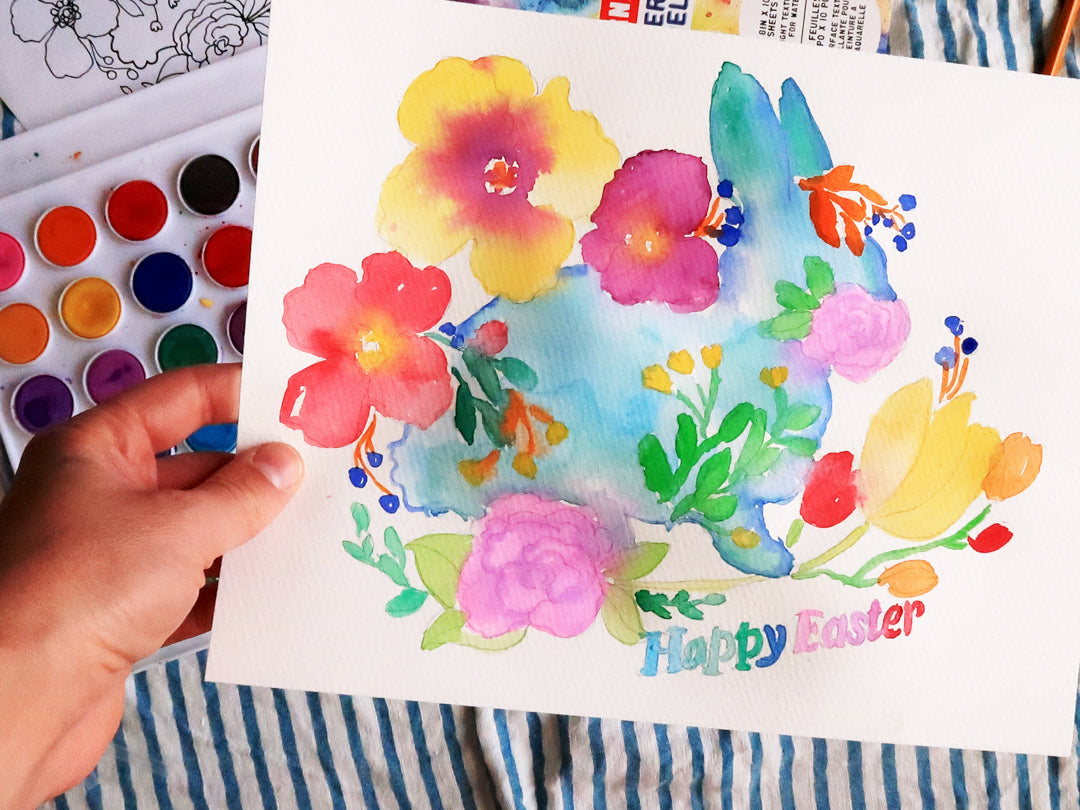
Welcome the Spring and the Celebration of Easter with a fun watercolor painting project. Using the image provided, create a wildflower easter bunny painting.
In this tutorial I will walk you through this cute painting, using the Kid Made Modern Wondrous Watercolor set. It only requires the kit and a couple supplies that you probably have laying around your house.

Materials Needed:
- Kid Made Modern Wondrous Watercolor set
- Pencil
- Paper Towel
- Water Cup
- Print out of Easter Image by Pink Puddle Studio
- Window or light box for tracing image
- Artists tape
Instructions:
Step 1
Gather your Supplies

Step 2
First you will need to trace out the design from the Pink Puddle Studio Easter print out image. Grab a sheet of the 8x10” watercolor paper included in the set, a pencil and artists tape. If you don’t have artist’s tape you can use painters tape but don’t push it down too hard on the paper, otherwise when you lift it off it will lift the paper with it. Place the watercolor paper over the print out and center it to fit on the paper. Then use two small pieces of tape on both sides to secure the papers together.

Step 3
Next, you want to trace the image. I find that in the day it is simple to use a window. All you have to do is tape it to a window and use your pencil to trace the image. If you have a light box you can use that instead.

Step 4
Open up your watercolor palette from the Kid Made Modern Wondrous Watercolor Set to start painting. Start with the larger flowers. Put some yellow on your brush and paint your first flower.

Step 5
Then while the flower is still wet add some purple to the center of the flower.

Step 6
Continue painting the larger flowers using red and purple and then add yellow for the centers.

Step 7 and Step 8
Once those flowers are dry, paint the body of the bunny using light blue and turquoise green.


Step 9
Fill your brush with dark blue and line the bunny for definition.

Step 10
Once the body of the bunny is dry, paint the tulips. The large one is painted yellow and the smaller ones are red and orange.

Step 11
Paint the roses pink and then add dark purple along the lines for shadow.

Step 12
Next, paint in the leaves using a variety of greens and orange from the palette.

Step 13
Paint the berries dark blue.

Step 14
Now that the bunny is done, finish off the painting by filling in “Happy Easter” at the bottom. Start by painting “Happy” with light blue and painting each remaining letter a different color in the blue green color family.

Step 15
Paint “Easter” using colors from the pink and red color family.

You have completed the project! You can frame it or give it as a gift! Happy Easter!

About the Author:

Rachel is the artist and founder of Pink Puddle Studio LLC. Her mural work has been televised on CNBC’s Cash Pad. Her work has been featured in HGTV Magazine, Phoenix New Times, Phoenix Home & Garden, Arizona Highways Magazine and College Times.
Connect with Rachel on instagram @pinkpuddlestudio and www.pinkpuddlestudio.com